
How to Use a Foam Roller: 6 Techniques for Faster Recovery
You finished a brutal leg session yesterday, and now your quads feel like two blocks of concrete. You have heard that a foam roller can help, so you grab one, roll around on the floor for a minute, and feel nothing change. Sound familiar? The tool works. The technique is what most people get wrong.
Foam rolling, known in the research as self-myofascial release, is one of the simplest ways to reduce stiffness, restore range of motion, and feel less wrecked between sessions. But rolling fast and randomly does almost nothing. Rolling slowly, in the right spots, with the right breathing, is what actually releases tension.
In this guide you will learn exactly how to use a foam roller using The Roll-Pause-Breathe Method, plus six techniques mapped to the muscle groups lifters tend to trash the most. This is how to use a foam roller the right way, so it earns its place in your recovery routine.
⚠️ This article is for general information only and does not replace professional medical advice. Do not roll directly over joints, bones, or an acute injury. If you have sharp pain, numbness, or a suspected strain, see a qualified professional.
Foam rolling works best when it is slow and deliberate. The Roll-Pause-Breathe Method tells you exactly how to release a tight muscle instead of just rolling over it.
- Roll slowly. Aim for around one inch per second, not fast back-and-forth scrubbing.
- Pause on tender spots for 20 to 30 seconds and let the tension ease before moving on.
- Breathe through it. Slow exhales help the muscle relax and make the pressure tolerable.
- Best before and after training. Use it to warm up tissue pre-workout and to reduce stiffness after.
- Never roll a joint, bone, or the lower back spine directly. Target the muscle bellies instead.
What Foam Rolling Actually Does
When you train hard, the connective tissue surrounding your muscles, called fascia, can become tight and adhered. Foam rolling applies direct pressure that helps this tissue glide freely again, while the compression drives blood flow into the area. Better circulation means more oxygen and nutrients reaching the muscle, which supports the repair process after a hard session.
The research from bodies like the National Strength and Conditioning Association is measured but consistent on two points: foam rolling reliably improves short-term range of motion, and it can reduce the perception of muscle soreness. It is not a magic cure and it will not replace sleep, protein, or sensible training loads. Think of it as one useful lever among several, not the whole toolbox.
Before You Start: Choosing Your Roller
The roller you pick changes the experience, so match it to your goal and your tolerance.
Smooth Rollers
A smooth, medium-density roller spreads pressure evenly and is the best starting point for beginners. If you are new to rolling, start here so the sensation is firm but manageable.
Textured Rollers
Rollers with ridges or knobs concentrate pressure into smaller areas, digging into knots more aggressively. These suit experienced lifters who want a deeper, more targeted release and find smooth rollers too mild.
Vibrating Rollers
A vibrating roller adds oscillation on top of pressure, which many people find helps the muscle relax faster and makes tender areas more tolerable. It reaches the large muscle groups a handheld massager struggles to cover well, like the mid-back and hamstrings, which is why it has become a popular recovery tool for serious trainers.
The Roll-Pause-Breathe Method
This is the core technique. Apply it to every muscle group below and the results change completely.
Roll. Move the target muscle over the roller slowly, roughly one inch per second. You are hunting for tender spots, not racing to a finish line. Fast scrubbing feels active but achieves very little.
Pause. When you hit a spot that feels tight or tender, stop and hold your body weight there for 20 to 30 seconds. This sustained pressure is what signals the muscle to release. Rolling straight past these spots is the single most common mistake.
Breathe. While you hold, take slow breaths and lengthen your exhale. Tensing up and holding your breath fights the release. A calm exhale lets the tissue soften under the pressure.
6 Foam Rolling Techniques by Muscle Group
1. Calves
Sit on the floor with the roller under one calf and your other foot crossed over the top for added pressure. Roll from just above the ankle to just below the knee, pausing on tight spots. Rotate your leg slightly inward and outward to cover the whole muscle.
2. Quads
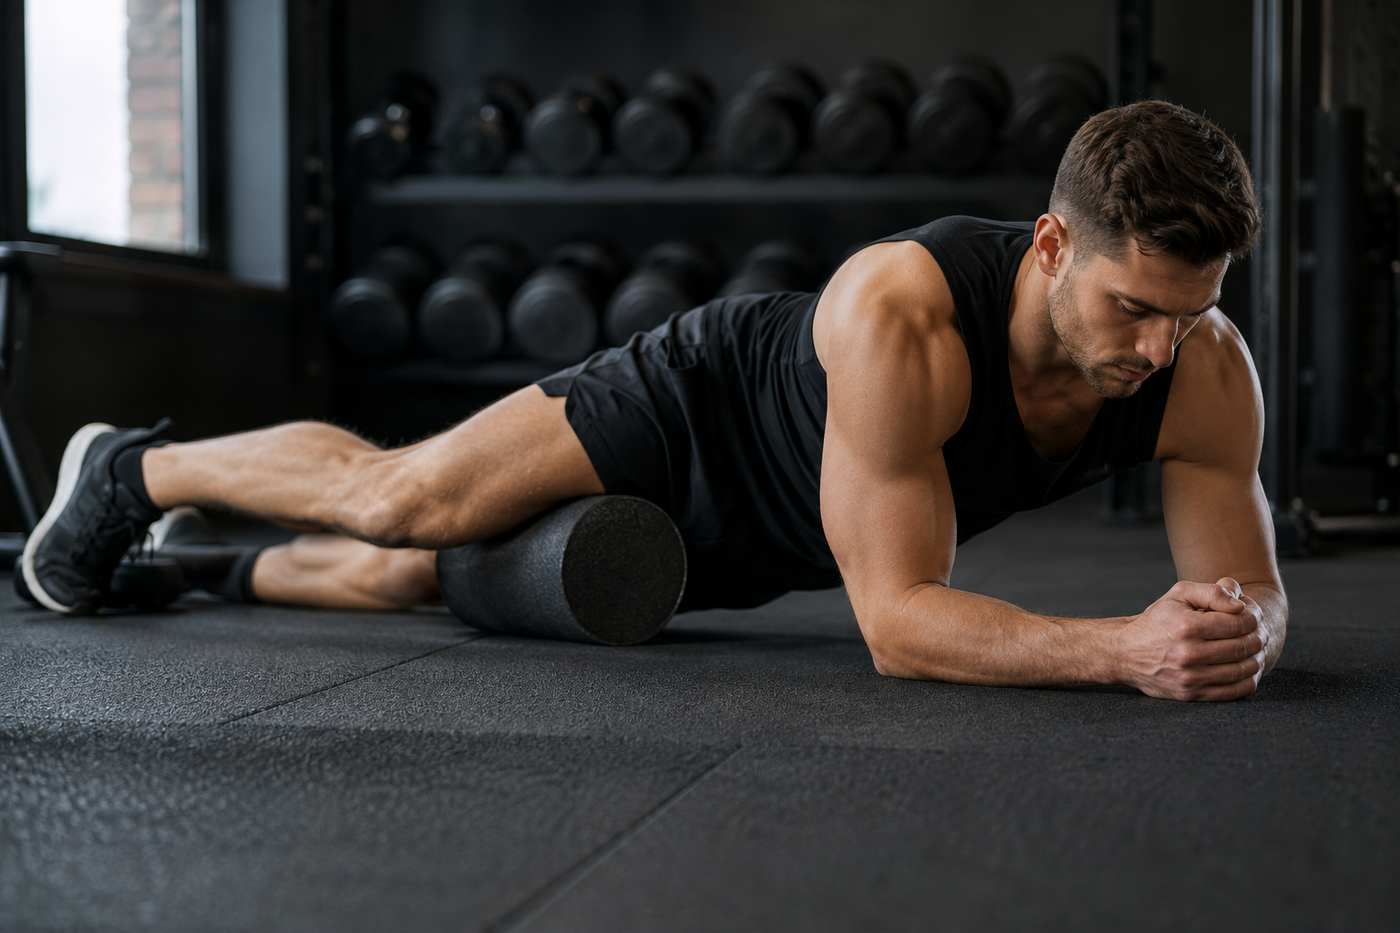
Lie face down with the roller under the front of one thigh, supporting your upper body on your forearms. Roll from above the knee to the top of the thigh. This is a prime target after any heavy leg day.
3. Outer Thigh and Hip
Lie on your side with the roller under the outer thigh. This area is often extremely tender, so keep the pressure moderate and never roll directly on the side of the knee. Focus on the muscle higher up near the hip, which is usually the real source of tightness.
4. Glutes
Sit on the roller, cross one ankle over the opposite knee, and lean your weight toward the crossed side. Roll the meat of the glute in small movements. Tight glutes quietly limit your squat depth, so this one pays off.
5. Upper Back
Lie with the roller across your upper back, hands supporting your head. Roll only the upper and mid-back, never the lower back, where there is no muscle to protect the spine. This helps counter the rounded posture that builds up from desk work and heavy pressing.
6. Lats
Lie on your side with your arm extended overhead and the roller tucked under the side of your back, below the armpit. Roll the long muscle down the side of your torso. Tight lats restrict overhead movement, so lifters who press or pull heavy benefit here.
How Long and How Often Should You Foam Roll?
You do not need marathon sessions. Spend around 30 to 60 seconds per muscle group, focusing on the two or three areas that feel worst that day. A full routine takes five to ten minutes.
Timing gives you two options. Rolling before training warms up the tissue and improves range of motion for your working sets. Rolling after training, or on rest days, helps manage stiffness and soreness. Many lifters do a little of both. Daily rolling is completely safe as long as you keep the pressure sensible.
Foam Roller vs Massage Gun: Which Should You Use?
They solve overlapping problems in different ways. A massage gun uses rapid percussion to target small, specific knots with precision, which makes it ideal for pinpointing one stubborn spot. A foam roller uses your own body weight across a broad surface, which makes it better for covering large muscle groups like the quads, back, and hamstrings in one pass.
You do not have to choose. Many serious trainers use the roller for broad coverage and the massage gun to dig into a specific area afterward. They complement each other rather than compete.
Foam Rolling Mistakes to Avoid
- Rolling too fast. Speed feels productive but skips right over the tension you are trying to release. Slow down.
- Rolling the lower back. There is no muscle mass there to shield your spine. Target the glutes and mid-back instead.
- Rolling directly on a joint or bone. Stay on the muscle bellies. Rolling over the knee, elbow, or spine can aggravate rather than help.
- Chasing pain. Firm discomfort is fine. Sharp, wince-inducing pain is a signal to ease off, not push harder.
- Rolling an acute injury. A fresh strain needs rest and assessment, not pressure.
Frequently Asked Questions
Does foam rolling actually work?
Yes, for specific outcomes. Research consistently shows it improves short-term range of motion and reduces the feeling of soreness. It will not lengthen muscles permanently or replace proper recovery habits, but as a quick, low-cost tool it earns its place.
Is it better to foam roll before or after a workout?
Both work for different reasons. Before training, it warms tissue and improves mobility for your sets. After training, it helps manage stiffness. If you only have time for one, roll whichever area feels tightest that day.
Should foam rolling hurt?
It should feel like firm, tolerable discomfort, the kind you can breathe through. Sharp or unbearable pain means you are pressing too hard or rolling over the wrong spot. Reduce the pressure and reassess.
How often can I foam roll?
Daily is fine. There is no need to overthink frequency. Just keep the pressure moderate and avoid grinding aggressively on the same tender spot for minutes at a time.
Can foam rolling replace stretching?
Not entirely. Rolling and stretching improve mobility through different mechanisms and work best together. A common approach is to roll first to release tension, then stretch to build the range you just opened up.
Start Rolling the Right Way
A foam roller only works if you slow down and let it. Apply the Roll-Pause-Breathe Method, target the muscles you actually train hard, and give the tender spots the time they need to release. Five focused minutes will do far more than fifteen rushed ones. Your next session will thank you.


